Pages

Friday, April 12, 2013

The Perfect Gluten Free Pastry

A friend once gave me a recipe for a really good gluten free pie crust that I have used over and over again. Over time the recipe has been tweaked in different ways to play with the texture and make a nice soft flaky pastry. I have also made changes to the method and I think I have perfected the recipe for a perfect pie crust.

Ingredients for a double crust pie

2 1/4 cups rice flour (I use a combination of brown and white)
3 tsp honey
1/2 tsp of salt
1 1/2 tsp xanthan gum
1 cup softened butter (room temp)
ice cold water

1. Stir together dry ingredients.
2. Cut butter and honey into dry ingredients with a fork so you have small pieces or "flakes" of butter through the dry ingredients. Place butter and flour mix into the freezer until butter is frozen.

3. Once butter is frozen add water 1Tbsp at a time until the mixture comes together into a smooth dough. It is better to have a slightly wet dough than a dry one. A dry dough will crumble and not come together smoothly and crack when you try and roll it out.
4. Wrap the dough as 2 separate disks in plastic wrap and place in the fridge for 30 - 60 minutes to allow the flour to absorb the water.

5. Using parchment paper roll out one disk at a time leaving the remaining in the fridge until needed. Roll a 1"4 inch thick circle. To make a very flaky crust fold the circle onto itself in thirds like a pamphlet (ie fold the top third down to the middle and the bottom edge up over the top). Then fold the dough in half like a book.
Roll dough out.
Fold top third down.

Fold bottom third up.
Fold in half like a book.
6. Roll the dough out again into a circle 1/4"-1/2" thick, slightly larger than the pan you will be cooking your pie in. Carefully transfer the crust to the pie pan and press into place. Trim edges of crust to fit into pan. If you have any tears or thin spots use any scraps of dough and press pieces into crust and smooth into place. 
  
7. To avoid crust from shrinking once baked place unbaked crust in freezer for 10 - 15 minutes. Dock the crust to avoid bubbles from forming.  
 8. Bake crust according to recipe. For some pies like lemon meringue or banana cream you will want to blind bake the crust first. To do this you will line the pie shell with parchment and fill the parchment with either pie weights or dry beans, this prevents bubbles from forming in the crust while you are baking without a filling in it. For other pies like fruit pies you can skip the blind bake and bake with the filling inside.
I have tried this recipe with all different temperatures of butter and found that since you do not develop the gluten's, because there aren't any, it is easier to work the butter in warm and then freeze the butter. Using a fork pressed through the butter to create "flakes" makes a tender crust and the folding method adds the flaky layers.

Sunday, March 31, 2013

How to Cook Quinoa

For those of you wondering what my method for cooking quinoa is I found it on the Internet. I found that I had to cut back on the ratio of quinoa to water as 1 cup of uncooked quinoa yields 3 cups cooked and as a single person I do not need that much cooked quinoa. So I cut the amounts in half and used 1/2 cup quinoa and 1 cup of chicken stock. Always use chicken stock instead of water for savory quinoa dishes as it results in much tastier dishes. I also add a bay leaf as I find this adds a nice savory flavor and I love bay. If you don't you could substitute with any fresh or dried herbs.

How To Cook Quinoa
Found on The Kitchn Website

Ingredients
1/2 cup Quinoa (any variety — white or golden, red, or black)
Olive oil
1 cup Chicken Stock (I use 1 cup of boiling water with an OXO chicken bouillon package)
1 Bay Leaf

Instructions
1. Measure out 1/2 cup quinoa and 1 cup chicken stock.
2. Place the quinoa in a fine-mesh strainer and rinse thoroughly with cool water. Rub and swish the quinoa with your hand while rinsing, and rinse for at least 2 minutes under the running water. Drain. If your strainer is a little to big and the dry quinoa tends to fall through, soak the quinoa for a few minutes to plump it up and then it should be fine to rinse in the strainer. Or if you do not have a fine mesh strainer you can use a cheesecloth lined colander.
3. Heat a drizzle of olive oil in the saucepan over medium-high heat and add the drained quinoa. Cook, stirring, for about 1 minute, letting the water evaporate.
4. Add in the chicken stock and bay leaf and bring to a rolling boil.
5. Lower heat  to the lowest setting and cook covered for 15 minutes.
6. After 15 minutes turn off the heat and remove the pot from the burner. Let stand for 5 minutes covered.
7. After 5 minutes remove the lid, remove the bay leaf, fluff the quinoa gently with a fork, and serve. (You should see tiny spirals (the germ) separating from and curling around the quinoa seeds.)

Thursday, March 21, 2013

Tonight's Dinner: Part Two - Quinoa Cakes

What to do with the leftover overcooked quinoa?

I came home from work and needed dinner fast. All I had in the fridge was the overcooked quinoa from the dinner earlier. You know, the one that looked like mashed potatoes. I decided to try something that my mother used to do when we were kids and turn the quinoa into cakes. My mom used to make potato cakes with leftover mashed potatoes that I looked forward to as a kid as they were an excuse for ketchup. Since the overcooked quinoa was like mashed potatoes I wondered if it would work the same as cakes.

These were so wonderful that since then I have actually made fresh quinoa to make these for dinner several times. If you use fresh quinoa instead of leftovers cool the quinoa before you mix in the eggs and cheese so you don't end up with cooked eggs and melted cheese before you get these crispy.

1 1/2 cups cooked quinoa
(I cook my quinoa in chicken stock instead of water for extra flavor in the quinoa)
1 lg egg
1/4 - 1/3 cup gluten free cornflake crumbs
Grated extra old cheddar cheese (to taste) or other favor cheese
2 Tbsp chopped chives (or green onions if you want more onion taste)
Freshly ground pepper

Breading mix:
1/3 - 1/2 cup gluten free cornflake crumbs
2 heaping TBSP of parmesan cheese
Pinch of italian herbs
Freshly ground pepper

Mix all ingredients for the cakes together adding more crumbs if the mix is too sticky and not firm enough to hold its shape. If mix is too dry and crumbly mash the quinoa and pat more firmly into cake shape. Divide the mix into 4 quarters and shape each quarter into a cake. Mix breading mixture together and place cake in crumbs coating all sides, including edges, and pressing into cake shape. Heat frying pan on med high with 1/4 inch of vegetable oil in bottom of pan until oil is hot. Depending on the size of your frying pan cook in batches of 2, frying until golden brown on both sides approximately 3-4 minutes per side. These can stick to the pan so do not try and flip them until they have developed their crust and your flipper can slide under them easily. Serve immediately.

Ketchup is a nice condiment, but if you like spicy try cocktail sauce (you know the one that shrimp is dipped in). It gives a nice spicy taste to the cakes.

I made them again today to go with my meat and I used goat cheese instead of the cheddar. I used a 2" slice off the fresh goat cheese log and crumbled it with my fingers into the quinoa mixture. It added a nice tangy cheese taste and melts into soft cheese bites in the cake. I used the cocktail sauce as my condiment and it went wonderfully with the goat cheese.

For my Paleo friends quinoa is not a grain but is actually a seed and is most closely related to beets and spinach so is totally safe for both gluten free and Paleo diets. You could substitute ground almonds for the crumbs inside the cakes and use finely chopped pecans for the outside crust.

Tuesday, March 5, 2013

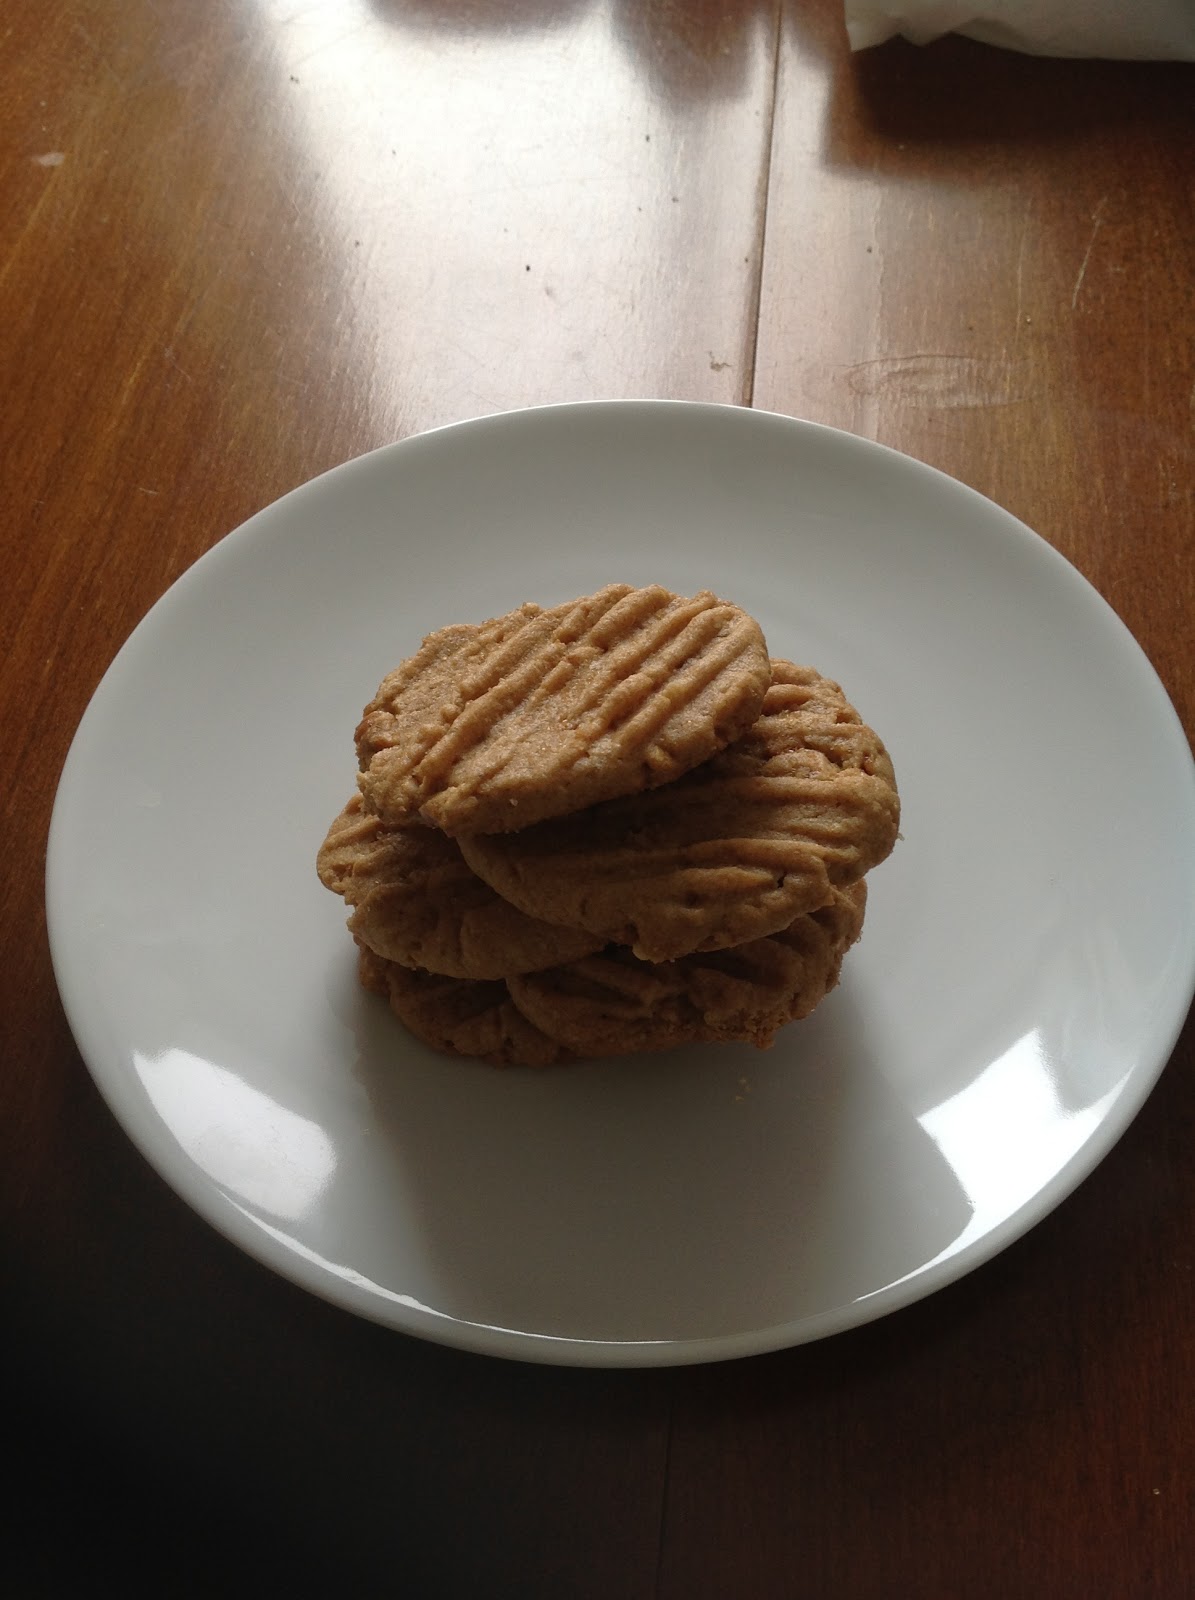
The Ultimate Gluten Free Peanut Butter Cookie

Friday (March 1) was National Peanut Butter Lovers Day and I decided to celebrate the day by making peanut butter cookies.

The first time I was craving peanut butter cookies after going gluten free I was very surprised when I checked out recipes to find a popular brand already had a recipe on the market that was naturally gluten free. It was also written right on the jar of Kraft Peanut Butter. This is a super simple recipe that is naturally gluten free, provided the peanut butter you use is gluten free. Make sure you read the label and that all ingredients are gluten free. A lot of peanut butter, especially the reduced fat ones, have added icing sugar which is not always gluten free.

I decided to make it simple and get natural or peanut only peanut butter and I have never looked back. No extra sugar added and there is so much more true peanut flavour to the natural peanut butter. It makes these cookies less sweet and more of a true peanut butter cookie. Cutting back on the amount of sugar already in the peanut butter justifies adding honey roasted peanuts to the cookies for extra crunch. These are very decadent cookies, so they only get made for special occasions, like National Peanut Butter Lovers Day and when I am craving peanut butter cookies. Also using brown sugar instead of white adds more flavour to the cookies instead of just sweet.

1 cup natural or peanut only peanut butter
1/2 cup brown sugar
1 lg egg
1 cup finely chopped honey roasted peanuts

Mix all ingredients together. Using a tablespoon make 3/4 - 1 inch balls and place them on a parchment lined baking sheet. Using a fork press the balls down making the classic peanut butter fork tine lines in the cookie. For extra crunch, sprinkle raw sugar on top of cookie, but this is completely optional.

Bake in preheated 325 degree oven for 15 minutes rotating baking sheet half way through. Remove from oven and let cookies cool on baking sheet for 5 - 10 minutes before transferring to a cooling rack to cool completely. For soft, chewy cookies, cookies should not be browned around the edges before removing from oven. Cookies are very soft straight out of the oven so they must cool on pan and be careful when moving to wire rack.


Monday, February 4, 2013

Tonight's Dinner

One of the things you will find in a gluten free lifestyle is you have to be creative. Not everything you cook or bake will turn out perfect, some will be inedible. But sometimes you can turn what could be a disaster into something delicious. Tonight was one of these times.

My plan for dinner was steak and something. Thanks to my sister-in-law re introducing me to quinoa, I have actually started to like quinoa. So when thinking about dinner and my options to go with steak I pulled the quinoa out of the cupboard. Last week I found a very simple recipe for cooking fluffy quinoa that was very tasty with a pork chop. When I tried the same recipe today, it did not work the same. The quinoa ended up overcooked and mushy. Once the steak was resting and I looked at the quinoa in the pot it reminded me of mashed potatoes. So being creative I thought I would turn them into a mashed potato substitute. I added a Tbsp of butter and a sprinkling of Parmesan cheese and stirred it in, kind of mashing the quinoa as I did.


They ended up tasting wonderful. Lighter than potatoes, but had the same satisfying texture and mouth feel. Went wonderfully with the perfectly rare steak.

Some times when cooking you have to be creative and turn a mistake into something better. Under cooked brownies can be cut up and frozen for ice cream sundaes, overcooked bread can be made into croutons. Just look at the possibilities and make lemonade out of lemons.

Sunday, February 3, 2013

Gluten Free Chocolate Turnovers

My sister came home with McDonalds one day for lunch and one of the things she had purchased was their new chocolate cherry pie. It looked really good and she asked me if I wanted to try it. I told her no, not only because it was not gluten free, but I didn't want to know how good it was and get hooked on it if it was fantastic and I could never eat it again. There are so many other non gluten free things that I already crave and cannot have, I did not want to add another to the list. But it got me thinking that I could make one myself. This lead me on a quest to make the perfect chocolate pastry. I used a pastry recipe that a friend had given me once, that I have since tweaked, and tweaked it further. It took a couple tries to perfect the recipe, the first one was really bad, but the end result was a flaky pastry with a gooey filling.

Elizabeth's Gluten Free Chocolate Turnovers

Chocolate Pastry:
1/2 cup brown rice flour
1/8 cup white rice flour
1/8 cup cocoa powder
1 tsp xanthan gum
Pinch salt
1 Tbsp honey
1/2 tsp vanilla (optional)
1/4 cup very cold butter, cut into small pieces
4 Tbsp ice water
Coarse raw sugar for sprinkling on top
All purpose gluten free flour mix for dusting

Sift rice flours, cocoa, salt and xanthan gum together, press out cocoa lumps. Add honey and vanilla, stir. Cut in butter until butter resembles small pea sized bits. Add water, 1 Tbsp at a time and stir until just combined. Shape into a disk, wrap disk in plastic wrap and chill in fridge for 1-2 hours. Once out of fridge place on well floured surface. Cut disk into four pieces. Working with one piece at a time, coat outside in flour and roll into a 1/4" thick rectangle. Fold the rectangle onto itself in thirds like a pamphlet (ie fold ends over onto middle). Coat with flour if necessary and roll out again into a 1/4" thick oval. Brush egg wash around perimeter of pastry, spoon 2 heaped Tbsp of filling onto left side of pastry, keeping at least 1/2 - 1 inch away from edge. Fold top over filling, careful not to squish filling out. Crimp edges with fork to seal pastry, trim extra pastry to make a clean edge. Brush top and sides with egg wash and sprinkle with coarse raw sugar. Cut slits in top to allow steam to vent and pastry will not poof up and make a large hole in the middle. Bake on parchment lined sheet at 400F for 25-30 minutes.

You can use any canned pie filling you wish. The first time I made them I used jam with a little cornstarch to thicken, but I found this made a very flat, soggy turnover. So I made my own pie filling with the jam. See below for recipe.

Filling:
1 cup diced strawberries
2 Tbsp your choice of jam, I used ED Smith Raspberry, Cherry, Key Lime Jam.
1 Tbsp cornstarch
1 tsp lemon juice

Cook first 3 ingredients in microwave for 2 minutes or until thickened. Add lemon juice and stir until combined. If filling becomes to thick, add another Tbsp of jam. Cool before using in turnovers.

These turnovers are fabulous hot out of the oven, but let them sit for at least 15 minutes or the filling will be extremely hot. After a day or so the pastry starts to get a little soggy, but the turnover still tastes great.


Friday, January 11, 2013

Give into Cravings: French Toast

This morning I had a craving for french toast. I love french toast and have not had it since going gluten free. I have always been scared to make it with a gluten free bread, because my Dad tried it a decade ago when I was first diagnosed and it was terrible. It was Sunday morning and my Grandma was visiting. She is strictly gluten free as she has Celiac and is very sensitive to gluten. My Dad decided he wanted to make gluten free french toast. He found a recipe, I am not sure where now, but it was one that was baked in the oven. You mix all the ingredients together, pour it over the bread slices and bake it in the oven in a rectangular pan. It was so soggy and mushy that I couldn't eat it. Since then if I had a craving for french toast I sucked it up and went for the real thing. Now that I have cut it all out of my life, I miss french toast.

I decided this morning that I would give into my craving and try and make a good gluten free french toast using the regular french toast method. I used my Udi's white sandwich bread as it is the only one I eat. I made my regular egg mixture (2 eggs, 4 egg shells of milk, cinnamon, nutmeg) and added 1/2 tsp honey for sweetness and to help the toasts brown. I dipped the bread into the egg mixture and drained each slice like I usually do, to remove any of the extra egg mixture. I paid special attention to the edges of the bread to make sure they felt a little squishy so they were not hard when cooked. I cooked them on a griddle with lots of butter (I always use butter for french toast not oil, it tastes so much better) until they were browned on each side and cooked in the middle.


All I can say is WOW!
Not quite as fluffy as french toast with a regular texas toast, but they tasted like real french toast. I did find that I needed to eat them hot off the griddle for the best taste, they got hard when cold. I only made 8 slices as I was not sure how they would keep and I only had a few slices of bread left. I will  definitely   try this recipe again when the craving hits.