Pages

Friday, December 20, 2013

Christmas Baking Traditions

I was a little behind in my Christmas baking this year, in fact I was a little behind in all things Christmas this year. It dawned on me a week before Christmas that I had not done any baking for the holidays to give to my friends as gifts. So I proceeded to bake up a storm the whole week prior to Christmas. Dough was made in the evenings and put in the fridge so that it could be baked and decorated on my next day off. The Friday before Christmas I had bins stacked on the dining room table of gingerbread people, snowflake and tree sugar cookies, maple pecan bars and peppermint meringues . My sister asked me one day who they were for, and although I responded that some were going to work and some were going to friends the answer that came to me in my head was that it was just tradition. I make Christmas cookies because my mother made christmas cookies and her mother made them before her. This tradition was passed down to me and I plan on sharing it with my children eventually. At this time of year I feel a need to bake. I really do not care who ends up getting them as long as I share them around and even if I had no one to share them with I would still feel the need to bake. 


One tradition I started with my mother when I was in college was baking one new recipe each year just to try something different. In the month leading up to our baking day I would scour magazines at the grocery store checkouts looking for the perfect cookie or bar. Now I search Pinterest and the internet for new and what I hope to be exciting recipes. 

This year the new recipe I tried was Maple Pecan Bars. I found the recipe in the Everyday Gluten Free Cookbook, by Robert M. Landolphi that I had borrowed from the library this summer when I was looking for new recipes to try. It popped up again when I was searching my recipes for Christmas baking inspiration. It looked perfect to try and ended up being so easy and delicious. When I took the box of goodies to work, one of my coworkers commented that they were so good they were like crack. These became known at work as crack bars because they are so delicious they are addictive. I found that these bars are best enjoyed within a few days of baking (not that they will last much longer than that anyway). Over time the sugar starts to crystallize again and they get a little gritty, but still taste good. 

Maple Pecan Bars
From Everyday Gluten Free Cookbook by Robert M. Landolphi

Pastry Crust:
1/2 cup brown rice flour
1/4 cup tapioca starch
1/4 cup potato starch
1/4 cup pecans
1/2 cup light brown sugar
1/4 cup white sugar (I omitted this as I found there is enough sugar in the rest of the recipe you don't really need this)
1/2 tsp xanthan gum
1/4 tsp salt (I omitted as I use salted butter)
6 Tbsp cold butter cut into small pieces

Filling:
1/3 cup pure maple syrup
1/3 cup lt brown sugar
1/4 cup heavy cream (whipping cream)
2 Tbsp unsalted butter
1 3/4 cups pecans coarsely chopped 
1/2 tsp vanilla

Preheat oven to 375F. Line an 8" square baking pan with parchment paper.

For the crust: in a food processor combine flours, starches, pecans, the 1/2 cup brown sugar, xanthan gum and salt. Whirl to blend (until pecans are finely chopped). Add the butter and blend until a fine meal forms. Press the crust mixture evenly over the bottom of the prepared pan. Bake for 20 minutes or until the edges of the crust begin to brown. 

Meanwhile, make the filling: in medium saucepan combine the maple syrup, the 1/3 cup brown sugar, heavy cream and butter. Bring to a boil over medium heat, stirring to dissolve the sugar and cook for 2 minutes. Remove from the heat and stir in pecans and vanilla. Pour onto the hot crust and bake for 10 minutes or until the filling bubbles in the centre.

Remove from oven and let cool completely in the pan. Unmold the cake and remove the parchment. Place the bars on a cutting board and cut into squares. 


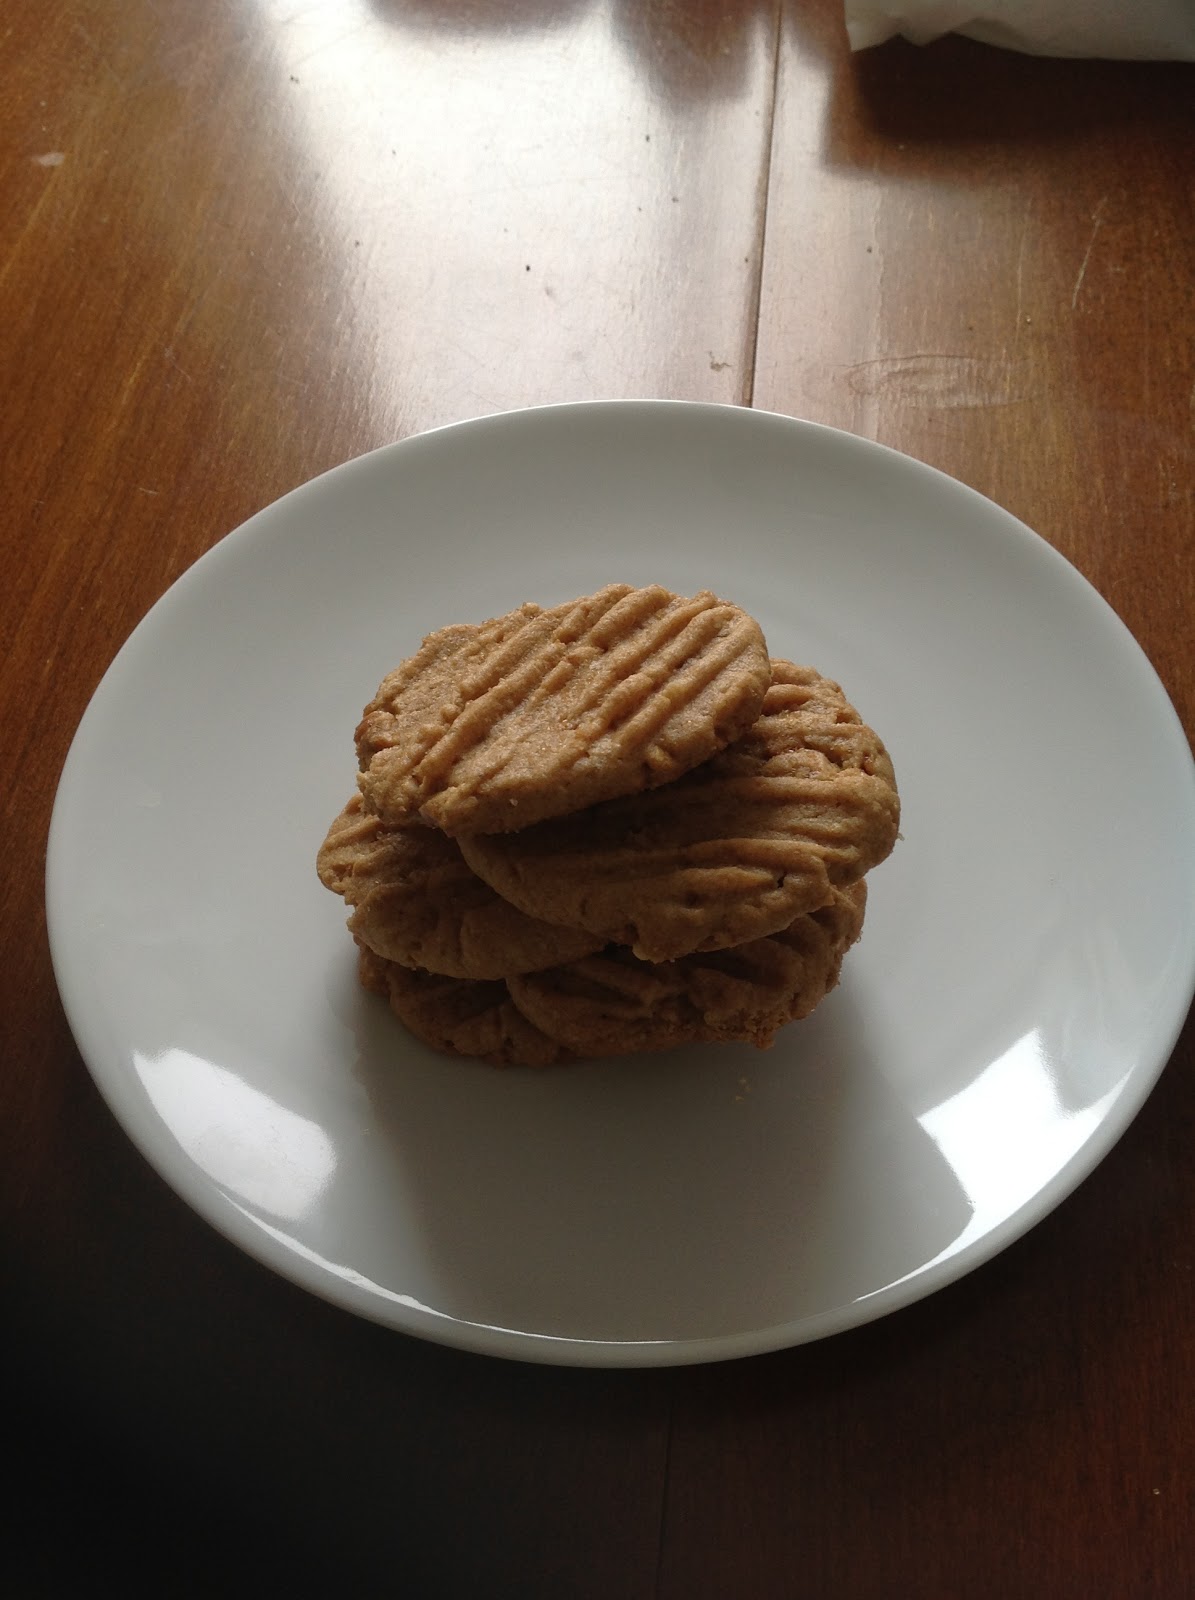
The Maple Pecan Bars are the ones in the middle of the box in the picture above. The recipes for the other cookies in the box can be found on last years Christmas Cookies posting. 

Monday, October 14, 2013

Happy Thanksgiving: Gluten Free Pumpkin Pie

Thanksgiving has always been one of my favourite holidays as I loved the family gathering and also the food. Turkey, stuffing, mashed potatoes, gravy and of course pumpkin pie. And while two of the previous items were not gluten free I would suffer all the pains just to have a taste of my mom's stuffing with gravy and pie for dessert. I have since forgone the stuffing as I have tried to make gluten free stuffings and they are just not the same, so I now unhappily decline the stuffing as it is just not worth it. But I knew this year that I could do a gluten free pumpkin pie as I have the perfect gluten free pie crust down pat. See my previous posting for the crust recipe and step by step instructions. 
                                               
All I needed was the perfect pumpkin pie filling, the one I remembered from childhood. Thankfully I have my grandmothers copy of the Women of Unifarm Cookbook (Alberta Farm Women) from 1972, which my mother also has. I remember making last years crustless pumpkin pie from this recipe and it tasted the same as mom's, well with one slight difference that will remain a secret between her and I. So I set out to make my first gluten free pumpkin pie today. Boy was it ever easy and the results are wonderful. I think it will be even better after a night in the fridge to completely set, if it makes it that far. 
                                               
Sometimes the older the recipe the less you have to change to make it wonderful. It was so simple. Just pumpkin, spices and the egg/milk custard for the filling. The only thing I changed was I omitted the flour from the original filling recipe as my mom had mentioned last year that she doesn't put it in. It did take considerably longer for the pie to bake so that the centre was set, 10-15 minutes more. And I rotated the pie a couple times for the crust to bake evenly. 

I loved the technique of starting at a higher temperature then lowering it. The crust was nice and crisp all the way to the bottom and not burnt around the edges. I will try this again.
                                               

Gluten Free Pumpkin Pie (submitted to cookbook by Mrs. Jean Leskow)

Crust: 
recipe found on the posting The Perfect Gluten Free Pastry

Filling:
2 Tbsp butter
1 1/2 cups canned pumpkin
3/4 tsp ground ginger
1/2 tsp nutmeg (or 1/3 freshly ground whole nutmeg)
3/4 tsp cinnamon
1/2 tsp salt
2 eggs
3/4 cups brown sugar
1 1/2 cups milk

Line 9" pie plate with pastry. Make hugh standing rim, flute. Chill in freezer while preparing filling. Preheat oven to 450 degrees. Melt butter, stir into pumpkin with spices. Beat eggs till light, stir in sugar and salt with milk. Add pumpkin mixture, beat until smooth. Pour into pie shell. Bake 15 minutes. Reduce heat to 350 degrees and bake 30-40 minutes longer, or until knife inserted in centre comes out clean. 

Thursday, October 3, 2013

Product Review: PC GF Yellow Loaf Cake Mix

This week I happened down the gluten free aisle at my local Loblaws and saw a variety of new PC Gluten Free products. They have new PC Gluten Free chocolate and yellow cake mixes, but it was the loaf cake that caught my eye. My grocery shopping this week included treats that I could take to my choir's "tea/snack time" after practice. I had already planned on taking GF brownies as well as fruit, but when I saw the pound cake mix I had a thought that I could try something that I have been searching for.
                                                

I have been searching for a recipe for a gluten free lemon loaf. My mom used to make a wonderful lemon loaf when I was a child. It was not made very often, but when it was it was fluffy as well as tart and sweet at the same time. I have not had a good lemon loaf since going gluten free. Most have a weird texture to the cake. When I saw the loaf cake mix I wondered if I could turn it into a lemon loaf and what would it taste like. 

I made the mix according to the directions on the box, with a couple of changes. I changed the 1/2 cup of water into 1/4 cup of lemon juice (juice of 1 lemon) and 1/4 cup of water, and I mixed into the batter the zest from 2 lemons. I baked the cake according to the directions and it took a little longer than the directions stated. Watch your cake and keep testing it by pressing the cake in the center until the cake springs back. If your finger leaves an indent, it is not ready. You can also test by toothpick, but when I did this it came out undercooked in the center. Once out of the oven I poked the cake all over the top with a toothpick. I melted 1/4 cup of sugar in 1/4 cup of lemon juice (from the second already zested lemon) in the microwave until the sugar was completely dissolved and it was bubbling. While the cake was hot out of the oven I spooned a couple tablespoons of the syrup over the hot cake. Over the next hour I continued to spoon the syrup over the cake to build a sticky lemon crust on top while it cooled. Once completely cooled I sliced the cake.
                                                 

I took it to choir practice. It was completely devoured and the results were so positive. Everyone loved the cake and there was nothing for me to bring home. Not quite as dense as a pound cake, it was moist and fluffy. With the addition of the lemon it had a wonderful flavour. I can see this cake being topped with berries and cream for a wonderful short cake in the future. Since there were no leftovers I guess I have to get another box and make a second one for me since I only had one slice.

I highly recommend this product.

Tuesday, August 20, 2013

What's Your Favourite Birthday Cake?

As children one of the usual questions leading up to your birthday is what kind of cake would you like. As adults we don't usually hear this question. The reason is either someone is picking up something they already know we like, or you are making your cake yourself. When living a gluten free life the choices for store bought cakes is slim and you usually need to reserve several days or weeks in advance. If you decide to take the time to do it yourself you have a few more options. 

When someone asks me what my favourite cake is I never really know how to answer. My favourite is whatever I am currently in the mood for. This year I was thinking about one of my favourite ice cream flavours, mint chocolate chip, and thought about how I could transform that into a cupcake.  
                                                 
I know that cupcakes are all the rage these days and cupcake shops are popping up all over the place, but I do love cupcakes for birthday parties. For children's parties they are so much more convenient than having to slice a cake while children are staring waiting for their piece. For adults it is the perfect portion of cake and it is easy to share with others so you don't end up eating a whole cake (or nearly) yourself. And when working in gluten free mode, cupcakes are easier to deal with than a whole cake. 

To make a Mint Chocolate Cupcake I used the ever so handy Betty Crocker Gluten Free Devils Food Cake mix. I made the cake mix into a batch of cupcakes, 18 in all, cooking them for 20 minutes or until the top of the cupcake springs back when touched. 

Once the cupcakes were cooled I made a batch of Chocolate Cream Cheese Icing that I created last year. I made it a little thinner than before and divided a little less than half into a small bowl and stirred in a couple drops of peppermint oil. I piped the filling into the centre of each cupcake. I then took the remaining icing and added 2 more cups of icing sugar and whipped it until light and fluffy. I piped the icing on top of each cupcake covering the filling. I topped the cupcake with a York Peppermint Bite cut in half. It was the perfect hint of mint in the middle of the cupcake. 

Chocolate Cream Cheese Icing
4oz of plain cream cheese
2 Tbsp softened butter
1 Tbsp milk
1/3 cup cocoa powder
2 cups icing sugar
Pinch of salt
1/2 tsp vanilla

Cream cheese and butter together, mix in milk. Sift in cocoa powder, salt and icing sugar. Blend until smooth, add vanilla at end. 

The original icing makes a thick, almost pudding consistency, if you like a fluffier icing add more icing sugar and milk until you get the consistency you desire. 

Sunday, July 14, 2013

Gluten Free Oatmeal Cookies and The Oats Debate

Oats are a contentious topic when speaking about gluten free living as many people think that to be gluten free they need to avoid oats. Oats themselves are gluten free, but are usually processed in a plant that processes other regular grains. This processing produces an oat that is cross contaminated with the gluten from the other grains. And while the oats should be safe they can cause no end of problems for someone who needs a gluten free lifestyle. Fortunately there are several options on the market for pure uncontaminated oats for those individuals who can tolerate oats. Some individuals still have difficulty digesting the pure oats, so oats should be excluded when starting a gluten free diet and reintroduced slowly to ensure you will not have issues with oats. 

Luckily I have no issue with oats as I love oatmeal cookies. I have been thinking about my favourite oatmeal cookie for a week now and I have some friends that I know will need a little treat tomorrow so I did a little baking. The recipe was originally adapted from a Company's Coming recipe in their Most Loved Treats cookbook. I first made the original recipe when I was visiting family in Calgary and have since adapted it to be gluten free and fit my tastes, a little less sugar than it calls for and different additions. My oatmeal cookies are big, soft, chewy cookies full of cashews and dark chocolate. The perfect treat in one big cookie. 
                                                        

Elizabeth's Dark Chocolate Cashew Oatmeal Cookies
Adapted from Oatmeal Chip Cookies 
Company's Coming - Most Loved Treats

1 cup butter softened
1 3/4 cups packed brown sugar
2 lg eggs
1 tsp vanilla
2 cups all purpose gluten free flour mix
1 tsp baking powder
1/2 tsp baking soda
2 cups pure uncontaminated oats
1 cup dark chocolate chunks
1 1/2 cups chopped cashews

This recipe is best done in a stand mixture as it is a very stiff dough. 

In the bowl of a stand mixer cream butter and sugar until light and creamy. Add eggs one at a time, beating well after each addition. Add vanilla and beat.

Combine flour, baking powder and baking soda in a small bowl. Add to butter/sugar mixture and stir well. 

Add oats, chocolate chunks and cashews and mix until well blended. Drop 2-3 Tbsp balls of dough onto parchment lined cookie sheet about 2-3 inches apart. Bake in 350 degree oven for 20 minutes rotating cookie sheet half way through. Let stand on cookie sheet for 5 minutes before transferring to a wire rack to cool completely. 


Thursday, July 11, 2013

Tonight's Dinner (and Tomorrow's Lunch): Balsamic Quinoa Salad

Lately I have been craving lighter foods, probably because it has been so hot out. I usually do not feel much like cooking when it is super hot and humid, sometimes I really don't feel like eating. So lately I have been eating a lot of quinoa as it can be eaten either hot or cold as a salad and is not a heavy feeling meal.

One night when I was deciding what I would do with the quinoa I thought about a greek salad I used to make with rice and wondered if I could make it with quinoa. I really did not want to follow the real recipe as it contained a mayo dressing which I am trying to stay away from. I thought about a balsamic  dressing instead. So I took the cooled quinoa and added a couple of tablespoons of balsamic vinegar and a few grinds of black pepper. Then mixed the quinoa around till the balsamic was soaked into the quinoa. I chopped cucumber and tomatoes really small, cubed some feta, and chopped chives (you could use green onion, I just love chives) and added it to the balsamic quinoa. I let it sit for about a half hour for the flavours to mingle. It was really great with the chicken I made, it was even better the next day for lunch. 

Tonight I just ate the quinoa salad as my main course as it is a healthy, hearty meal without being heavy. It really does not need any meat to go with it as quinoa is a complete protein itself. My balsamic quinoa salad is very low fat as the only fat is a little olive oil in the cooking of the quinoa and the feta cheese. It is also full of vegetables. It is simple and can be changed in countless ways with whatever vegetables you like and have on hand. The best thing about it is it keeps exceptionally well and makes a fantastic lunch for the next few days. I have made it ahead some evenings without having it for dinner specifically to take to work for lunches the next couple days. 

Elizabeth's Balsamic Quinoa Salad

1/2 cup quinoa
1cup boiling water
1Tbsp olive oil

Cook quinoa according to directions on my posting How to Cook Quinoa without the chicken stock and bay leaf. Cool quinoa completely.

Add 2-3 Tbsp of a good balsamic vinegar and a few grinds of black pepper to taste and mix until completely absorbed. 

Add:
4 small/baby cucumbers (finely diced)
1/2 pint cherry tomatoes (finely diced)
4 oz feta cheese (diced)
3 Tbsp of chopped chives (or green onions if you prefer)

Mix all ingredients together and let sit for 30 minutes for flavours to mingle and serve or portion out for future meals. 


Saturday, June 8, 2013

First Gluten Free Paying Customer

This weekend I had my first paying client for gluten free goodies. I was asked to make gluten free cupcakes for a baby shower for a co-worker who is gluten free and I was excited to help her celebrate in this way, even if I was not going to the shower. I have made goodies for co-workers before and I have taken them to potlucks and such, but I have never been paid for the work. The idea of being paid for my work came with new challenges. Every time I make something I put my whole heart into it and as a perfectionist I always scrutinize my work and want everything to be perfect. But this time was different as everything needed to be perfect. I did not want to have someone pay me for a product that was not perfect. 

Friday night I did a trial run to make sure the recipe was good and I had my baking time down so it would all go smoothly in the morning. I knew they would taste good as I have made the recipe as a cake before, just not cupcakes. I had a vision for the decorations and I really hoped it would work out as I wanted it to.
                                              

The only thing I worried about was how much to charge. I have tried to price homemade craft items before and failed. It can be tricky as you never really get the value of your time in a dollar amount, especially if it takes you a really long time to make something. You end up charging more than anyone would ever pay for something. I then decided it is just better to give crafty items as gifts, not sell them. But with baked goods there are so many on the market that I had a pretty good idea where to start at. I could not start myself at the top as this was my first experience, but I needed to cover my costs and make a little for my time. 

Everything worked out perfectly in the baking and decorating. I was very excited to find really cute cupcake boxes to transport my creations as I have transported cupcakes before with disastrous results and I needed them to arrive safely. I was very pleased with how the experience turned out and I really hope our Mommy-to-be enjoyed the cupcakes. 


Saturday, May 11, 2013

Gluten Free Lemon Tarts

Today we had another bake sale at work and I yesterday morning I was home and bored so I thought I would bake something to bring to today's bake sale. I had some leftover lemon curd in the fridge and thought if I made a batch of pastry I could make mini lemon tarts. 
                                                

I used my Perfect Gluten Free Pastry recipe and rolled it into 1/2 inch balls and then rolled those out to 1/4" thick circles. I used my 1/2 cup stainless steel measuring cup to cut out circles that fit perfectly into my mini muffin pan. I fluted the edges of the circle as I worked the dough into the muffin cups to give the tarts a little personality. I chilled the tart shells in the freezer for a 5-10 minutes and when frozen I gave the tarts a twist in the pan to ensure they would not stick. I baked them for 15-20 minutes at 350, until they were golden brown. I then filled them with the leftover lemon curd that I had reheated in the microwave for a few minutes to make it fluid again. They were so nice and tart, just the perfect little treat. 


Saturday, May 4, 2013

Tonight's Dinner: Homemade Pasta

I have had the best day today.

Today I played in my kitchen and made fresh homemade gluten free pasta. I have wanted to try and make gluten free pasta myself for a long time. Yesterday at the grocery store all I could think about for dinner was lasagna. I used to make a killer lasagna with the fresh pasta sheets you can get at the grocery store, before going gluten free. Since then I have always made my lasagna with the brown rice noodles. They tend to soak up the sauce and usually end up overcooked in the lasagna and don't reheat very well. What I really wanted for dinner tonight was a lasagna I used to make, one that was very saucy. To do this I thought I would try and make my own gluten free pasta.
My Dining Room Table
It was so much easier than I thought it would be. I found a recipe online that had several reviews that seemed easy. The recipe called for differing amounts of gluten free flours, but since most of the amounts are close to what is in my all purpose mix, I changed the different flours and just used the total of my all purpose mix. I used my stand mixer because I do not own a food processor. I put the dry ingredients in the bowl of the stand mixer and mixed the eggs and oil in a measuring cup and slowly incorporated the wet into the dry while the mixer was on low speed. I had to add more water (6 Tbsp) than the recipe called for to get a smooth consistency on the dough. It took me a little bit of time to knead the dough to make it smooth, but in the end it was all worth it.

Actually rolling out the dough was a little trickier. I did have the pasta attachments for my KitchenAid stand mixer, I had received them as a bonus when I bought it and thought they would never get used (boy was I wrong). The only thing I found was if the dough got even a little bit dry, it crumbled when going through the pasta roller. Cut the dough into 8 balls instead of 4 and keep the extra ones covered with a very damp towel. This will keep them moist for rolling. Flatten the balls with a rolling pin before starting on the widest setting. Roll out until setting 4 or 5 on the attachment worked best for lasagna sheets. I did not boil the noodles, just let them dry for 30 minutes and then layered them into my lasagna.

I will definitely be trying this again. I am not sure I can go back to brown rice noodles again for lasagna.

Gluten Free Fresh Pasta Recipe
Adapted from Posting By Carol Kicinski

Ingredients
2 cups plus 3 Tbsp of all purpose gluten free flour mix
1 tablespoon xanthan gum
1 teaspoon kosher or fine sea salt
2 tablespoons olive oil
3 large eggs
2-4 tablespoons water

Directions
Place all the dry ingredients in the bowl of a food processor fitted with a steel blade or stand mixer with paddle attachment. Pulse several times to combine. Whisk the olive oil and eggs together in a spouted mixing cup or pitcher. With the machine running, slowly add the liquid ingredients to the dry. Add water, 1 tablespoon at a time, just until it starts to form into a dough. It should be pliable and just a tiny bit sticky, not sticky enough to stick to your hands. In a stand mixer it will look crumbly, but when you press it together it forms a ball.

Scrape the dough onto a work surface and knead a few times to smooth it out. Divide into 8 equal portions and roll into balls.

Flatten one ball at a time slightly with a rolling pin to help it through the pasta rollers. Run the dough, 1 ball at a time, through a pasta roller until desired thickness is achieved or roll between two sheets of plastic wrap until very thin. The thinner the pasta is rolled, the more tender it will be. Keep the other balls covered with a damp towel to prevent drying out. If rolling by hand, flip the plastic wrap and dough over several times while rolling. Occasionally, lift the top layer of plastic wrap and replace it to help keep the dough from sticking.

Pull off the top layer of plastic wrap and cut into the desired width. Repeat with the remaining dough balls.

The pasta can be cooked immediately, laid out to dry a little (for up to an hour) or frozen. To freeze, place the pasta in an airtight container or plastic storage bag. Thaw for about 30 minutes before cooking.

To cook the pasta, bring a large pot of heavily salted water to a boil. Add the pasta, stir a time or two to keep from sticking and cook for 2 – 5 minutes, depending on the width and thickness. Do not over cook. Serve immediately.

This gluten free recipe makes 4 servings or enough for one large 4 layer lasagna.

Monday, April 29, 2013

The Very Best Banana Bread


Growing up there were always bananas in the house for breakfast and snacks. I learned early that I was not a huge fan of bananas. It took longer to figure out why I did not like bananas growing up. I discovered there is a very small window as to the ripeness of a banana that I will eat. It needs to be just shy of hard and green, with some green on the skin. I know this is weird, but if it gets even a bit too ripe I will not eat them. For the longest time I would not buy bananas as I knew that they would be too ripe before I could eat them all. So now if I buy bananas there is a good chance there will be extra bananas that are too ripe for me that end up in the freezer.

Today when I was checking the freezer trying to find something for dinner there were several frozen bananas that I needed to move to find the meat and so I decided to make banana bread. I have been experimenting for the longest time to find a really great gluten free banana bread recipe. I think I have finally found it. Originally the recipe came from Everyday Gluten Free Cookbook, by Robert M Landophi. I have played with the quantities and flours to make it a bit healthier and reduced the sugar. This recipe makes a very light and tender banana bread. It is not a heavy, dense bread like some gluten free recipes that I have tried. Very nice on it's own, without having to be toasted.

The Best Banana Bread

1/2 cup white rice flour
1/2 cup brown rice flour
1/4 cup sorghum flour
1/4 cup quinoa flour
1 tsp xanthan gum
1 tsp baking soda
1 tsp baking powder
1/2 cup butter, at room temp
3/4 cup white sugar
2 lg eggs
1 1/2 tsp vanilla extract
1 cup mashed bananas (about 2 med bananas)

Preheat oven to 350F. Line a 9x5" loaf pan with parchment or waxed paper.

In a bowl combine flours, xanthan gum, baking soda, and baking powder. Whisk to combine.

Cream the butter and sugar together until light and fluffy. Add the eggs and vanilla, beating until thoroughly incorporated and then mix in the mashed banana. Gradually mix in the dry ingredients until a smooth batter forms.

Pour batter into prepared pan and smooth the top. Bake 50-60 minutes or until a toothpick inserted in the center of the loaf comes out clean. Remove from the oven and let cool for 15 minutes on a wire rack. Unmold and cool completely.

This recipe can also be made into 12 muffins, filling muffin cups 2/3 full with the batter and baking for 25-30 minutes.


Friday, April 12, 2013

The Perfect Gluten Free Pastry

A friend once gave me a recipe for a really good gluten free pie crust that I have used over and over again. Over time the recipe has been tweaked in different ways to play with the texture and make a nice soft flaky pastry. I have also made changes to the method and I think I have perfected the recipe for a perfect pie crust.

Ingredients for a double crust pie

2 1/4 cups rice flour (I use a combination of brown and white)
3 tsp honey
1/2 tsp of salt
1 1/2 tsp xanthan gum
1 cup softened butter (room temp)
ice cold water

1. Stir together dry ingredients.
2. Cut butter and honey into dry ingredients with a fork so you have small pieces or "flakes" of butter through the dry ingredients. Place butter and flour mix into the freezer until butter is frozen.

3. Once butter is frozen add water 1Tbsp at a time until the mixture comes together into a smooth dough. It is better to have a slightly wet dough than a dry one. A dry dough will crumble and not come together smoothly and crack when you try and roll it out.
4. Wrap the dough as 2 separate disks in plastic wrap and place in the fridge for 30 - 60 minutes to allow the flour to absorb the water.

5. Using parchment paper roll out one disk at a time leaving the remaining in the fridge until needed. Roll a 1"4 inch thick circle. To make a very flaky crust fold the circle onto itself in thirds like a pamphlet (ie fold the top third down to the middle and the bottom edge up over the top). Then fold the dough in half like a book.
Roll dough out.
Fold top third down.

Fold bottom third up.
Fold in half like a book.
6. Roll the dough out again into a circle 1/4"-1/2" thick, slightly larger than the pan you will be cooking your pie in. Carefully transfer the crust to the pie pan and press into place. Trim edges of crust to fit into pan. If you have any tears or thin spots use any scraps of dough and press pieces into crust and smooth into place. 
  
7. To avoid crust from shrinking once baked place unbaked crust in freezer for 10 - 15 minutes. Dock the crust to avoid bubbles from forming.  
 8. Bake crust according to recipe. For some pies like lemon meringue or banana cream you will want to blind bake the crust first. To do this you will line the pie shell with parchment and fill the parchment with either pie weights or dry beans, this prevents bubbles from forming in the crust while you are baking without a filling in it. For other pies like fruit pies you can skip the blind bake and bake with the filling inside.
I have tried this recipe with all different temperatures of butter and found that since you do not develop the gluten's, because there aren't any, it is easier to work the butter in warm and then freeze the butter. Using a fork pressed through the butter to create "flakes" makes a tender crust and the folding method adds the flaky layers.

Sunday, March 31, 2013

How to Cook Quinoa

For those of you wondering what my method for cooking quinoa is I found it on the Internet. I found that I had to cut back on the ratio of quinoa to water as 1 cup of uncooked quinoa yields 3 cups cooked and as a single person I do not need that much cooked quinoa. So I cut the amounts in half and used 1/2 cup quinoa and 1 cup of chicken stock. Always use chicken stock instead of water for savory quinoa dishes as it results in much tastier dishes. I also add a bay leaf as I find this adds a nice savory flavor and I love bay. If you don't you could substitute with any fresh or dried herbs.

How To Cook Quinoa
Found on The Kitchn Website

Ingredients
1/2 cup Quinoa (any variety — white or golden, red, or black)
Olive oil
1 cup Chicken Stock (I use 1 cup of boiling water with an OXO chicken bouillon package)
1 Bay Leaf

Instructions
1. Measure out 1/2 cup quinoa and 1 cup chicken stock.
2. Place the quinoa in a fine-mesh strainer and rinse thoroughly with cool water. Rub and swish the quinoa with your hand while rinsing, and rinse for at least 2 minutes under the running water. Drain. If your strainer is a little to big and the dry quinoa tends to fall through, soak the quinoa for a few minutes to plump it up and then it should be fine to rinse in the strainer. Or if you do not have a fine mesh strainer you can use a cheesecloth lined colander.
3. Heat a drizzle of olive oil in the saucepan over medium-high heat and add the drained quinoa. Cook, stirring, for about 1 minute, letting the water evaporate.
4. Add in the chicken stock and bay leaf and bring to a rolling boil.
5. Lower heat  to the lowest setting and cook covered for 15 minutes.
6. After 15 minutes turn off the heat and remove the pot from the burner. Let stand for 5 minutes covered.
7. After 5 minutes remove the lid, remove the bay leaf, fluff the quinoa gently with a fork, and serve. (You should see tiny spirals (the germ) separating from and curling around the quinoa seeds.)

Thursday, March 21, 2013

Tonight's Dinner: Part Two - Quinoa Cakes

What to do with the leftover overcooked quinoa?

I came home from work and needed dinner fast. All I had in the fridge was the overcooked quinoa from the dinner earlier. You know, the one that looked like mashed potatoes. I decided to try something that my mother used to do when we were kids and turn the quinoa into cakes. My mom used to make potato cakes with leftover mashed potatoes that I looked forward to as a kid as they were an excuse for ketchup. Since the overcooked quinoa was like mashed potatoes I wondered if it would work the same as cakes.

These were so wonderful that since then I have actually made fresh quinoa to make these for dinner several times. If you use fresh quinoa instead of leftovers cool the quinoa before you mix in the eggs and cheese so you don't end up with cooked eggs and melted cheese before you get these crispy.

1 1/2 cups cooked quinoa
(I cook my quinoa in chicken stock instead of water for extra flavor in the quinoa)
1 lg egg
1/4 - 1/3 cup gluten free cornflake crumbs
Grated extra old cheddar cheese (to taste) or other favor cheese
2 Tbsp chopped chives (or green onions if you want more onion taste)
Freshly ground pepper

Breading mix:
1/3 - 1/2 cup gluten free cornflake crumbs
2 heaping TBSP of parmesan cheese
Pinch of italian herbs
Freshly ground pepper

Mix all ingredients for the cakes together adding more crumbs if the mix is too sticky and not firm enough to hold its shape. If mix is too dry and crumbly mash the quinoa and pat more firmly into cake shape. Divide the mix into 4 quarters and shape each quarter into a cake. Mix breading mixture together and place cake in crumbs coating all sides, including edges, and pressing into cake shape. Heat frying pan on med high with 1/4 inch of vegetable oil in bottom of pan until oil is hot. Depending on the size of your frying pan cook in batches of 2, frying until golden brown on both sides approximately 3-4 minutes per side. These can stick to the pan so do not try and flip them until they have developed their crust and your flipper can slide under them easily. Serve immediately.

Ketchup is a nice condiment, but if you like spicy try cocktail sauce (you know the one that shrimp is dipped in). It gives a nice spicy taste to the cakes.

I made them again today to go with my meat and I used goat cheese instead of the cheddar. I used a 2" slice off the fresh goat cheese log and crumbled it with my fingers into the quinoa mixture. It added a nice tangy cheese taste and melts into soft cheese bites in the cake. I used the cocktail sauce as my condiment and it went wonderfully with the goat cheese.

For my Paleo friends quinoa is not a grain but is actually a seed and is most closely related to beets and spinach so is totally safe for both gluten free and Paleo diets. You could substitute ground almonds for the crumbs inside the cakes and use finely chopped pecans for the outside crust.

Tuesday, March 5, 2013

The Ultimate Gluten Free Peanut Butter Cookie

Friday (March 1) was National Peanut Butter Lovers Day and I decided to celebrate the day by making peanut butter cookies.

The first time I was craving peanut butter cookies after going gluten free I was very surprised when I checked out recipes to find a popular brand already had a recipe on the market that was naturally gluten free. It was also written right on the jar of Kraft Peanut Butter. This is a super simple recipe that is naturally gluten free, provided the peanut butter you use is gluten free. Make sure you read the label and that all ingredients are gluten free. A lot of peanut butter, especially the reduced fat ones, have added icing sugar which is not always gluten free.

I decided to make it simple and get natural or peanut only peanut butter and I have never looked back. No extra sugar added and there is so much more true peanut flavour to the natural peanut butter. It makes these cookies less sweet and more of a true peanut butter cookie. Cutting back on the amount of sugar already in the peanut butter justifies adding honey roasted peanuts to the cookies for extra crunch. These are very decadent cookies, so they only get made for special occasions, like National Peanut Butter Lovers Day and when I am craving peanut butter cookies. Also using brown sugar instead of white adds more flavour to the cookies instead of just sweet.

1 cup natural or peanut only peanut butter
1/2 cup brown sugar
1 lg egg
1 cup finely chopped honey roasted peanuts

Mix all ingredients together. Using a tablespoon make 3/4 - 1 inch balls and place them on a parchment lined baking sheet. Using a fork press the balls down making the classic peanut butter fork tine lines in the cookie. For extra crunch, sprinkle raw sugar on top of cookie, but this is completely optional.

Bake in preheated 325 degree oven for 15 minutes rotating baking sheet half way through. Remove from oven and let cookies cool on baking sheet for 5 - 10 minutes before transferring to a cooling rack to cool completely. For soft, chewy cookies, cookies should not be browned around the edges before removing from oven. Cookies are very soft straight out of the oven so they must cool on pan and be careful when moving to wire rack.


Monday, February 4, 2013

Tonight's Dinner

One of the things you will find in a gluten free lifestyle is you have to be creative. Not everything you cook or bake will turn out perfect, some will be inedible. But sometimes you can turn what could be a disaster into something delicious. Tonight was one of these times.

My plan for dinner was steak and something. Thanks to my sister-in-law re introducing me to quinoa, I have actually started to like quinoa. So when thinking about dinner and my options to go with steak I pulled the quinoa out of the cupboard. Last week I found a very simple recipe for cooking fluffy quinoa that was very tasty with a pork chop. When I tried the same recipe today, it did not work the same. The quinoa ended up overcooked and mushy. Once the steak was resting and I looked at the quinoa in the pot it reminded me of mashed potatoes. So being creative I thought I would turn them into a mashed potato substitute. I added a Tbsp of butter and a sprinkling of Parmesan cheese and stirred it in, kind of mashing the quinoa as I did.


They ended up tasting wonderful. Lighter than potatoes, but had the same satisfying texture and mouth feel. Went wonderfully with the perfectly rare steak.

Some times when cooking you have to be creative and turn a mistake into something better. Under cooked brownies can be cut up and frozen for ice cream sundaes, overcooked bread can be made into croutons. Just look at the possibilities and make lemonade out of lemons.

Sunday, February 3, 2013

Gluten Free Chocolate Turnovers

My sister came home with McDonalds one day for lunch and one of the things she had purchased was their new chocolate cherry pie. It looked really good and she asked me if I wanted to try it. I told her no, not only because it was not gluten free, but I didn't want to know how good it was and get hooked on it if it was fantastic and I could never eat it again. There are so many other non gluten free things that I already crave and cannot have, I did not want to add another to the list. But it got me thinking that I could make one myself. This lead me on a quest to make the perfect chocolate pastry. I used a pastry recipe that a friend had given me once, that I have since tweaked, and tweaked it further. It took a couple tries to perfect the recipe, the first one was really bad, but the end result was a flaky pastry with a gooey filling.

Elizabeth's Gluten Free Chocolate Turnovers

Chocolate Pastry:
1/2 cup brown rice flour
1/8 cup white rice flour
1/8 cup cocoa powder
1 tsp xanthan gum
Pinch salt
1 Tbsp honey
1/2 tsp vanilla (optional)
1/4 cup very cold butter, cut into small pieces
4 Tbsp ice water
Coarse raw sugar for sprinkling on top
All purpose gluten free flour mix for dusting

Sift rice flours, cocoa, salt and xanthan gum together, press out cocoa lumps. Add honey and vanilla, stir. Cut in butter until butter resembles small pea sized bits. Add water, 1 Tbsp at a time and stir until just combined. Shape into a disk, wrap disk in plastic wrap and chill in fridge for 1-2 hours. Once out of fridge place on well floured surface. Cut disk into four pieces. Working with one piece at a time, coat outside in flour and roll into a 1/4" thick rectangle. Fold the rectangle onto itself in thirds like a pamphlet (ie fold ends over onto middle). Coat with flour if necessary and roll out again into a 1/4" thick oval. Brush egg wash around perimeter of pastry, spoon 2 heaped Tbsp of filling onto left side of pastry, keeping at least 1/2 - 1 inch away from edge. Fold top over filling, careful not to squish filling out. Crimp edges with fork to seal pastry, trim extra pastry to make a clean edge. Brush top and sides with egg wash and sprinkle with coarse raw sugar. Cut slits in top to allow steam to vent and pastry will not poof up and make a large hole in the middle. Bake on parchment lined sheet at 400F for 25-30 minutes.

You can use any canned pie filling you wish. The first time I made them I used jam with a little cornstarch to thicken, but I found this made a very flat, soggy turnover. So I made my own pie filling with the jam. See below for recipe.

Filling:
1 cup diced strawberries
2 Tbsp your choice of jam, I used ED Smith Raspberry, Cherry, Key Lime Jam.
1 Tbsp cornstarch
1 tsp lemon juice

Cook first 3 ingredients in microwave for 2 minutes or until thickened. Add lemon juice and stir until combined. If filling becomes to thick, add another Tbsp of jam. Cool before using in turnovers.

These turnovers are fabulous hot out of the oven, but let them sit for at least 15 minutes or the filling will be extremely hot. After a day or so the pastry starts to get a little soggy, but the turnover still tastes great.


Friday, January 11, 2013

Give into Cravings: French Toast

This morning I had a craving for french toast. I love french toast and have not had it since going gluten free. I have always been scared to make it with a gluten free bread, because my Dad tried it a decade ago when I was first diagnosed and it was terrible. It was Sunday morning and my Grandma was visiting. She is strictly gluten free as she has Celiac and is very sensitive to gluten. My Dad decided he wanted to make gluten free french toast. He found a recipe, I am not sure where now, but it was one that was baked in the oven. You mix all the ingredients together, pour it over the bread slices and bake it in the oven in a rectangular pan. It was so soggy and mushy that I couldn't eat it. Since then if I had a craving for french toast I sucked it up and went for the real thing. Now that I have cut it all out of my life, I miss french toast.

I decided this morning that I would give into my craving and try and make a good gluten free french toast using the regular french toast method. I used my Udi's white sandwich bread as it is the only one I eat. I made my regular egg mixture (2 eggs, 4 egg shells of milk, cinnamon, nutmeg) and added 1/2 tsp honey for sweetness and to help the toasts brown. I dipped the bread into the egg mixture and drained each slice like I usually do, to remove any of the extra egg mixture. I paid special attention to the edges of the bread to make sure they felt a little squishy so they were not hard when cooked. I cooked them on a griddle with lots of butter (I always use butter for french toast not oil, it tastes so much better) until they were browned on each side and cooked in the middle.


All I can say is WOW!
Not quite as fluffy as french toast with a regular texas toast, but they tasted like real french toast. I did find that I needed to eat them hot off the griddle for the best taste, they got hard when cold. I only made 8 slices as I was not sure how they would keep and I only had a few slices of bread left. I will  definitely   try this recipe again when the craving hits.